How to repot plants starts with knowing when: repot when the roots, container or medium show a need, not simply because a plant is new. Choose a pot with drainage, use a suitable mix and keep the original planting depth. This sequence is for ordinary container-grown leafy plants; orchids and succulents need adjustments to the medium and aftercare.
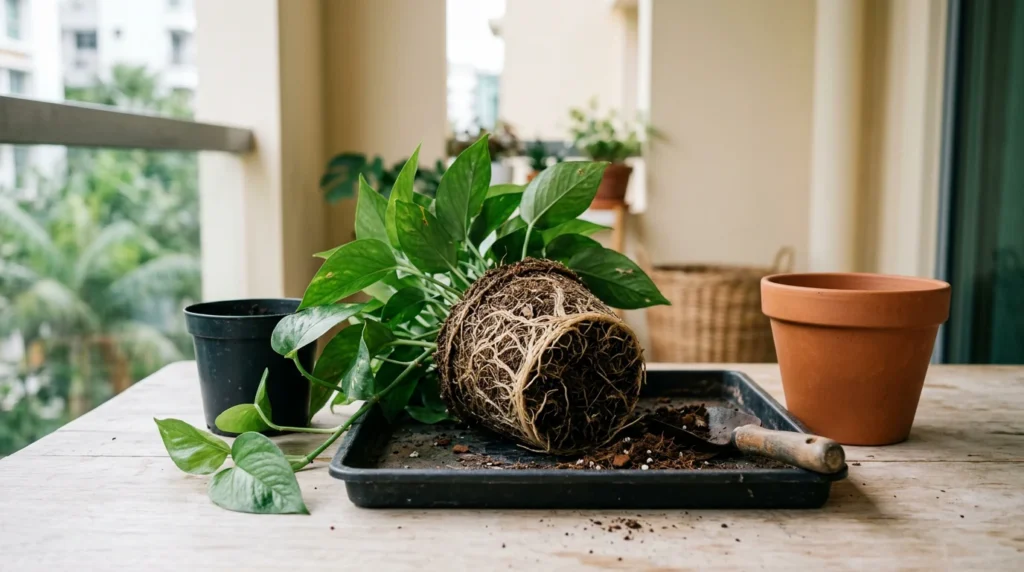
AI-generated plant image for this guide. Actual plants and growing conditions vary.
At a glance
• Look for crowded roots, failing medium or an unstable container before repotting.
• A refresh of old medium does not always require a larger pot.
• Handle the root ball gently and avoid burying stems deeper than before.
Step 1 of how to repot plants: decide whether repotting will help
Inspect the plant and its pot first.
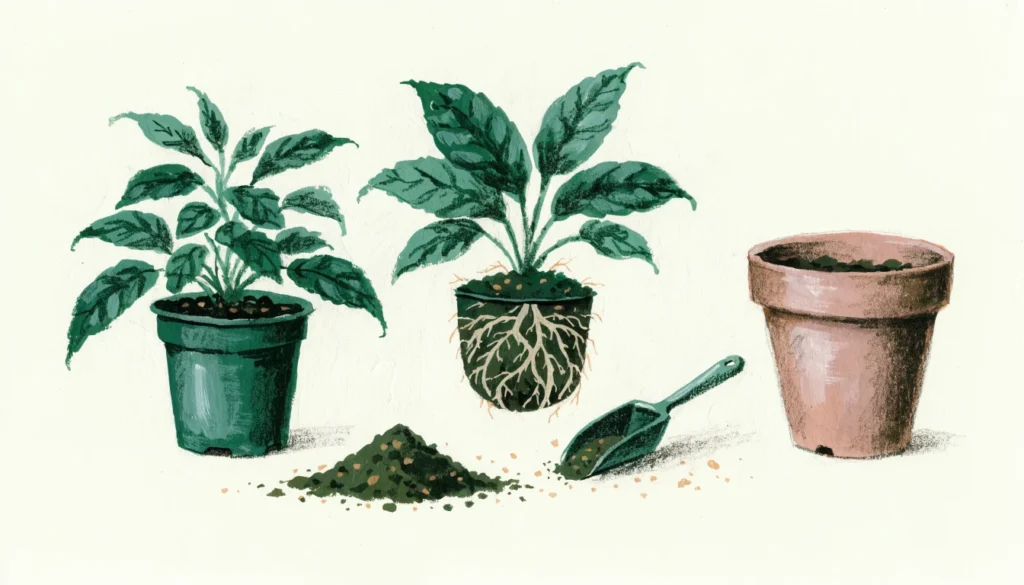
Roots densely circling the container, a root-filled pot that dries unusually fast, or deteriorated compacted medium can justify repotting. A few roots visible at one drainage hole are evidence to investigate, not proof that a much larger pot is needed.
Water running straight through can mean a crowded root ball, but it can also bypass a very dry medium down gaps at the sides. Check the actual roots and whether the centre becomes wet. Do not treat every yellow leaf as a repotting instruction; investigate root health and pests when the symptoms fit.
Step 2: choose the pot and prepare your tools
Prepare a draining pot, appropriate fresh medium, a tray or sheet to contain spills, gloves and clean cutting tools if damaged roots need removal. Check that you can lift and support the plant safely. For a large floor plant, arrange help before taking it out of its container.
Choose only a modest size increase when more root space is needed. An oversized pot creates a large volume of wet medium around a small root system. If the goal is to refresh deteriorated mix, the same cleaned container may still be suitable. A decorative pot can hold a draining inner pot, provided you can empty collected water.
Do not add gravel at the bottom as a substitute for drainage holes. Keep holes open; if necessary, a suitable mesh can prevent medium escaping without sealing them. Stability, drainage and root space matter more than matching the pot to the height of the foliage.
Step 3: match the medium to the plant
Choose the medium according to the plant's roots and moisture needs. A Monstera, moisture-loving edible herb and epiphytic orchid do not need identical root environments. Our Which mix? guide compares the three main blends by plant type.
Aroid Mix is a chunky, soilless option for suitable aroids. Potting Mix is an all-round option for many soil-grown plants. Vege Mix is more moisture-retaining and intended for edible growing. Read the product details and consider your container and position before choosing.
For bark-grown orchids, use an appropriate orchid medium instead of following this leafy-houseplant routine unchanged. For dry-adapted succulents, a suitably draining mineral-rich blend and different watering aftercare may be needed. Buying more medium is not a reason to use the same blend for every plant.
Step 4: remove the plant and inspect roots gently
Support the root ball and ease the container away. Squeeze a flexible nursery pot or loosen the sides carefully rather than pulling on leaves or stems. If roots have locked the plant into the pot, avoid forcing them through a narrow opening; freeing the container may be safer than tearing healthy roots.
Inspect the roots and medium. Healthy roots should generally feel firm, although colour varies by plant and growing medium. Soft, collapsing roots or a sour smell warrant a closer assessment. Remove clearly rotten material with clean tools when necessary, but do not prune healthy roots simply to make the plant fit a chosen pot.
Gently loosen densely circling outer roots where practical. Avoid stripping every healthy plant bare or washing all medium away as a routine step. The aim is to improve the root environment with the least disturbance necessary, not to make the roots look perfectly clean.
Step 5: keep the same depth and backfill
Put enough medium in the new container to support the root ball at its previous planting depth. Position the plant, then fill around the sides. Leave room at the rim for watering. Do not bury the stem base or crown beneath a deep new layer. Settle the medium gently rather than compressing it into a hard block. Check that the plant is supported without forcing it down. For a heavy or climbing plant, add appropriate support without crushing roots. Our Monstera repotting guide gives more specific advice for larger aroids.
Step 6 of how to repot plants: adjust watering and watch recovery
For an ordinary leafy houseplant with healthy roots, water to settle the fresh medium and let it drain. Follow species-specific guidance if roots were cut or the plant is a succulent or orchid. Do not apply one immediate-watering rule to every plant regardless of its condition.
Return it to a suitable, stable position rather than combining repotting with sudden strong sun exposure. Check moisture before watering again: fresh medium and a different pot can change drying substantially. Avoid extra-strong fertiliser or routine pesticide as an automatic repotting treatment.
Record the repotting date and watch the plant's firmness, drainage and next growth. Temporary mild stress can occur, but worsening collapse, wet soft roots or spreading damage need investigation. If uncertain, send clear photos of the pot, roots and leaves to our team before making another major change.
How to repot plants: tools and setup
Learning how to repot plants is mostly preparation. Gather a clean pot with drainage, fresh mix, a trowel or spoon, and a tray or newspaper to catch spilled medium.
Water the plant lightly the day before, so the root ball holds together. How to repot plants without stress also means working in a shaded spot and keeping the roots from drying out.
Our soil mixes page and the Which Mix finder help with the medium step of how to repot plants.
How to repot plants: common mistakes
A common mistake in how to repot plants is choosing a pot that is far too large. Extra wet medium around a small root ball can stay damp for too long.
Another is burying the stem deeper than before. How to repot plants safely means keeping the original planting depth.
Finally, watering heavily and feeding straight away can add stress. After you finish repotting, water thoughtfully and wait before fertilising.
How to repot plants: special cases
Orchids and succulents change how to repot plants, because they need airier media and different aftercare. Our orchid care and succulent care guides cover these.
Large plants need extra hands and a stable pot, since a tall plant in a light pot can tip. How to repot plants of this size starts with planning the lift.
Plants with aerial roots, such as monstera, can be repotted with support in place. See repotting monstera and philodendron.
Repot plants safely: aftercare for the first weeks
After you repot plants, water thoughtfully and keep them out of harsh sun for the first few days while the roots settle.
Check moisture below the surface before watering again. When you repot plants into fresh mix, the pot may dry at a different pace from before.
Hold off on fertiliser until you see healthy new growth. It is easy to repot plants and then overfeed them, which adds stress.
Keep notes of when you repot plants, which mix you used and how the plant responds, so the next repot goes more smoothly.
Products to consider
Choose the mix for the plant you actually grow. The three main blends serve different moisture and root needs; the soil guide is the best next step before selecting a bag.
Common questions
Must I repot every new plant immediately?
No. Check its roots, drainage, medium and condition first. A healthy plant in a suitable container may benefit from time to settle into its new position. Repot promptly when there is a clear root-zone problem, rather than following a purchase-day rule.
Do I need to remove all the old soil?
Not routinely. Gentle handling reduces unnecessary root damage. Remove material that is clearly unsuitable or decayed as the situation requires, but do not automatically bare-root a healthy plant. Different species and root problems need different approaches.
Is there a best month to repot in Singapore?
Prioritise the plant's health, active growth and your ability to provide suitable aftercare rather than copying a northern spring calendar. Address urgent root problems when discovered. Avoid unnecessary disturbance during severe stress or when you cannot monitor the plant afterwards.
How to repot plants without hurting the roots?
Loosen the root ball gently, keep as many healthy roots as possible and avoid pulling hard on the stem. Handle the roots as little as the plant allows.
How often do I need to know how to repot plants?
Most plants only need repotting when roots, container or medium show a need, not on a fixed schedule.
Quick answers about repotting
Should I repot a plant that is flowering? Often it is better to wait until flowering finishes unless the plant is in urgent trouble, because repotting adds stress.
Can I reuse old potting mix? Old mix may have lost structure and nutrients, so fresh mix is usually the better choice, especially after root problems.
Do I need to water after repotting? Usually yes, to settle the mix around the roots, but let excess drain and avoid leaving the plant in water.
Which pot size should I choose? Pick one slightly larger than the root ball, with drainage holes, rather than a much bigger pot.
Read next
Repotting Monstera and Philodendron in Aroid Mix
Compacted Potting Soil: Fix Slow Drainage Without Guesswork
Orchid care in Singapore: roots, watering and yellow leaves
Sources and further reading
NParks and University of Maryland Extension describe container choice and root condition as key repotting considerations. Editorial method: this guide draws on the horticultural references below and adapts their care principles to Singapore homes. It does not report a Sprout Lab product trial. Product suggestions are optional and should follow their labels. Learn about Sprout Lab or contact us with photos and growing conditions for help choosing a next step.
NParks: Planting in containers — accessed 10 October 2026.
University of Maryland Extension: Houseplant repotting signs — accessed 10 October 2026.
Prepared by the Sprout Lab editorial team using the horticultural references above. Local examples adapt general guidance to Singapore homes; they are not results of product trials. Product suggestions use current Sprout Lab descriptions. Follow the label for application instructions.