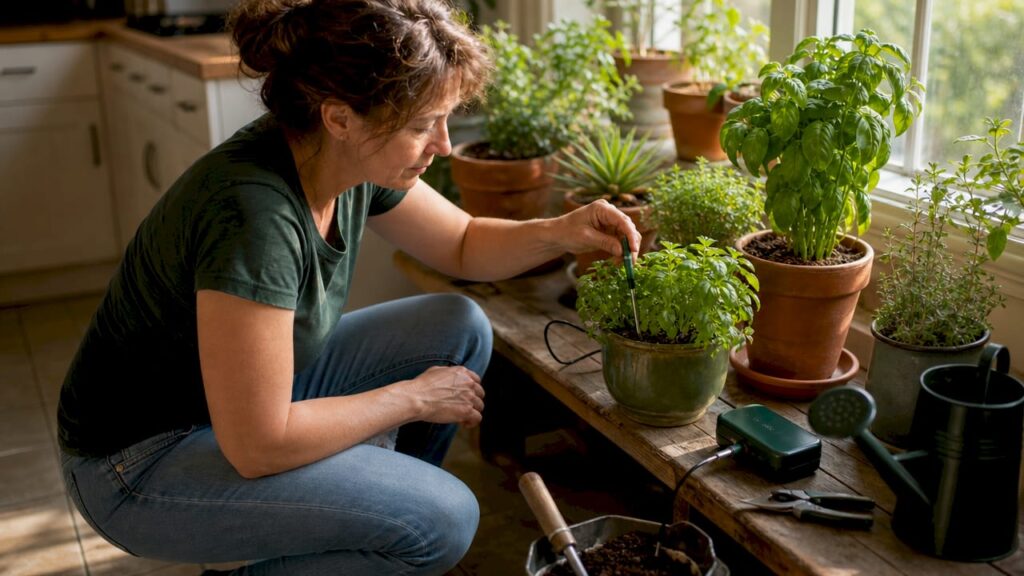
Automating an indoor garden watering system means using soil moisture sensors, timers, or smart controllers to deliver water precisely when your plants need it, without any manual effort. For busy urban gardeners managing herbs, vegetables, or houseplants in small spaces, this approach solves two problems at once: plants get consistent care, and you stop losing weekends to watering schedules. Tools like ECH2O EC-5 sensors, RainPoint drip kits, and ESPHome controllers have made this accessible even for beginners with no electronics background.
What does it take to build an indoor garden watering system?
An automated indoor garden watering system has five core components: a soil moisture sensor or timer, a water pump, a controller or relay module, tubing, and drip emitters. Each part plays a specific role. The sensor reads soil conditions. The controller decides when to act. The pump moves water. The tubing and emitters deliver it to each pot.
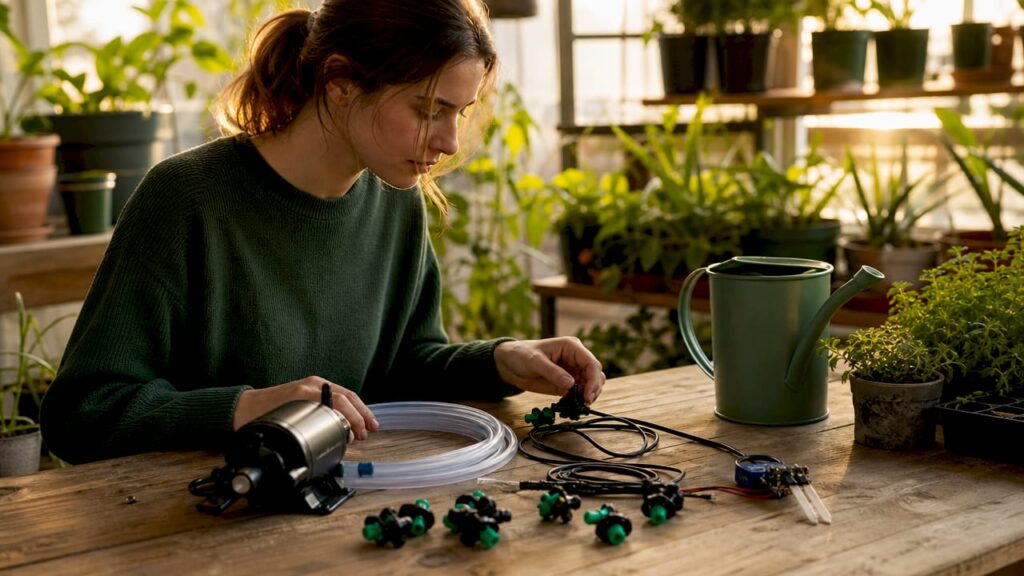
Sensor-based systems and timer-based systems are the two main categories. Sensor systems use real-time soil data to trigger watering only when moisture drops below a set threshold. Timer systems run on a fixed schedule regardless of actual soil conditions. The right choice depends on your plant count, budget, and how much setup complexity you can handle.
Components overview
- Soil moisture sensors (such as the ECH2O EC-5 or basic capacitive sensors): measure volumetric water content (VWC) in the soil and send a signal to the controller
- Microcontrollers or relay modules (such as ESP32 with ESPHome firmware): receive sensor data and trigger the pump relay
- Water pump: a small submersible or peristaltic pump sized for your container volume
- Tubing and drip emitters: distribute water to individual pots; adjustable drippers let you fine-tune flow per plant
- Timer or controller: for simpler setups, a standalone digital timer handles scheduling without any coding
The RainPoint beginner kit covers 10–15 indoor plants and includes adjustable drippers and anti-siphon valves plus a low-water shutoff and status indicators. That feature set makes it one of the most complete entry-level options available.
Beginner kit vs. DIY sensor setup
| Feature | Beginner kit (e.g., RainPoint) | DIY sensor setup (e.g., ESP32 + ECH2O) |
|---|---|---|
| Setup time | Under 30 minutes | Several hours |
| Cost | Low to moderate | Moderate (parts vary) |
| Water efficiency | Moderate (timer-based) | High (sensor-triggered) |
| Customization | Limited | Full control |
| Best for | 10–15 pots, no tech experience | Tech-comfortable growers, any scale |
How to set up a soil moisture-based indoor garden watering system
A soil moisture sensor system works by detecting higher electrical resistance in dry soil, which triggers a pump relay to run water until the soil reaches the target moisture level. The feedback loop stops the pump automatically once the threshold is met. This prevents both overwatering and dry spells.
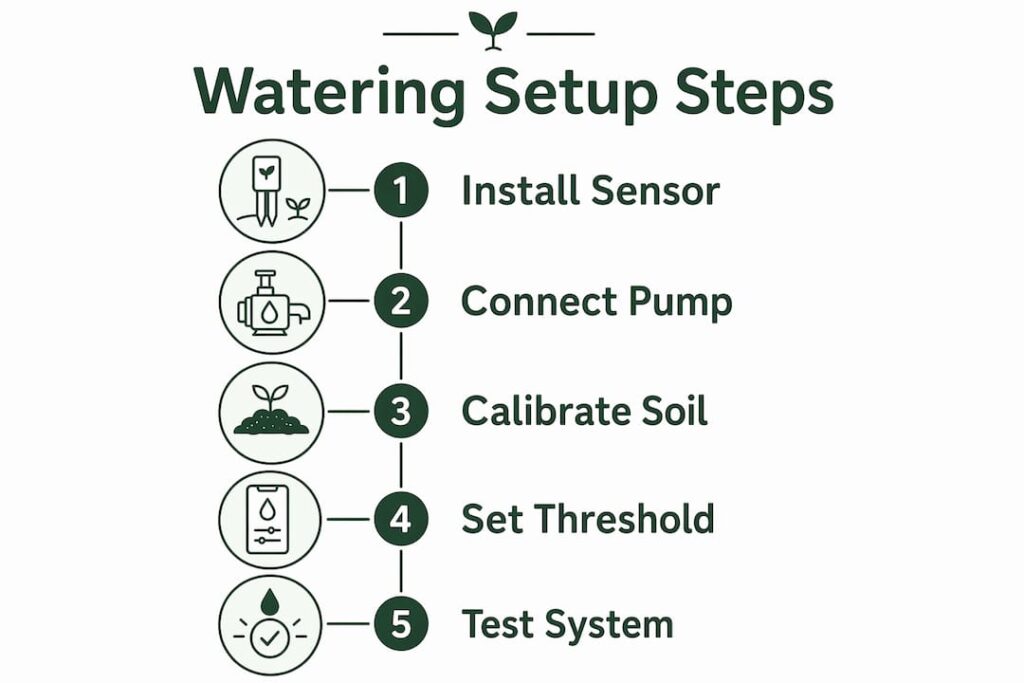
Follow these steps to build and calibrate your system:
- Place the sensor correctly. Insert the sensor probe into the root zone, roughly halfway down the pot. Avoid placing it near the pot wall or directly under a dripper, where readings will be skewed.
- Wire the sensor to your controller. Connect the ECH2O or capacitive sensor output to an analog input pin on your ESP32 or relay module. Use ESPHome firmware to read the analog value and map it to a moisture percentage.
- Run a calibration watering. Apply about 150% of your normal watering volume, then wait 24 hours for the soil to reach field capacity. Record the sensor reading at that point as your “wet” value.
- Find your dry baseline. Let the soil dry out naturally over several days. Record the sensor reading when the soil surface feels dry and plants show early stress signs. That is your “dry” value.
- Set your trigger threshold. A 20–25% VWC trigger works well for most indoor plants. Program the controller to start the pump when moisture falls below this point.
- Program a watering duration. Start with 30–60 seconds per pot and adjust based on observed soil saturation after each cycle.
- Enable hysteresis logic. Set the pump to turn off only when moisture exceeds a slightly higher threshold than the start point, such as 35% VWC after triggering at 20%. This prevents the pump from cycling on and off rapidly as sensor readings fluctuate near the threshold.
Pro Tip: Add a manual test button to your controller wiring. It lets you trigger a watering cycle on demand to verify the pump, tubing, and emitters are all working before you rely on the system fully.
Proper sensor calibration is the single most important step. Calibration errors cause the system to water too early or too late, defeating the purpose of automation entirely. Take the time to get accurate dry and wet values for your specific soil mix.
Timers vs. sensor-based: which indoor garden watering system fits your garden?
Simple programmable timers are easier to set up but cannot adapt to changing soil conditions. If your apartment gets warmer in summer or you add more plants, a fixed schedule will over or underwater without any warning. Sensor-based systems read actual soil moisture and adjust in real time, which is why they consistently outperform timers for plant health.
The water savings difference is significant. Switching to a sensor-based irrigation system can reduce water usage by over 80% compared to timer-only setups. That translates to healthier roots, fewer cases of root rot, and lower water bills over time.
| Factor | Timer-based | Sensor-based |
|---|---|---|
| Setup complexity | Very low | Low to moderate |
| Adapts to environment | No | Yes |
| Water efficiency | Low to moderate | High (80%+ savings possible) |
| Risk of overwatering | Moderate to high | Low |
| Cost | Low | Moderate |
| Best user | Absolute beginners | Growers ready for a small learning curve |
For beginners managing 10–15 pots, dual-knob control systems that set duration and frequency with simple twist dials outperform app-based smart irrigators. The menus in app-driven systems add confusion that beginners do not need when they are just starting out.
Pro Tip: Start with a timer-based kit for your first month. Once you understand your plants’ watering patterns, add a soil moisture sensor to the same setup. You get the simplicity of a timer with the accuracy of sensor feedback.
Common mistakes and how to fix them
Most problems with automatic plant watering systems trace back to four root causes: poor calibration, rigid scheduling, pump cycling, and blocked tubing. Knowing what to watch for saves you from losing plants to a system that was supposed to protect them.
- Sensor misreading: A sensor placed too close to the pot wall or a drainage hole will read falsely dry or wet. Reposition it to the center of the root zone and recalibrate using the 24-hour field capacity method.
- Rigid schedules ignoring environment: Ambient temperature and humidity change how fast soil dries out. A timer set for winter will overwater in summer. Switch to sensor-based triggers or manually adjust your timer schedule each season.
- Pump short cycling: Without hysteresis logic, a pump can toggle on and off dozens of times per hour as sensor readings hover near the threshold. This shortens pump lifespan dramatically. Set a higher shutoff threshold than the start threshold to prevent this.
- Clogged drip emitters: Mineral deposits from tap water block small emitter holes over time. Flush emitters monthly with a diluted vinegar solution and replace any that stay blocked.
- Pump failure: Check power connections first, then verify the relay is triggering correctly. A multimeter across the pump terminals confirms whether the relay is passing current.
Pro Tip: Check your plants’ leaves weekly even when the system is running. Yellowing lower leaves often signal overwatering; crispy leaf tips signal underwatering. The plants tell you what the sensor cannot.
Automatic watering systems prevent root rot by delivering water only when needed, but only if the system is calibrated correctly. A poorly calibrated sensor causes the exact waterlogging it was designed to prevent.
Key takeaways
Automating indoor garden watering works best when you pair the right components with accurate sensor calibration and hysteresis logic to protect both your plants and your pump.
| Point | Details |
|---|---|
| Sensor-based beats timer-based | Soil moisture sensors reduce water use by over 80% and adapt to real plant needs. |
| Calibration is non-negotiable | Record accurate dry and wet VWC values for your specific soil before setting thresholds. |
| Hysteresis protects your pump | Set a higher shutoff threshold than the trigger point to prevent rapid pump cycling. |
| Start simple, then scale | A beginner kit like RainPoint handles 10–15 pots with zero tech experience required. |
| Monitor plants, not just data | Weekly visual checks confirm the system is performing as intended. |
Why I think most urban gardeners overcomplicate this
Most articles on smart indoor garden irrigation push readers straight toward ESP32 microcontrollers and custom firmware on day one. That advice works for engineers. For a busy person with 12 herb pots on a kitchen shelf, it creates a project that never gets finished.
My honest observation after watching many urban gardeners set up their first automatic plant watering systems: the ones who succeed long-term start with a simple dual-knob kit, learn their plants’ actual water needs over four to six weeks, and then add sensor capability once they have a baseline. The ones who start with a full DIY sensor rig often spend more time debugging than gardening.
That said, do not stay on timers forever. Rigid watering schedules genuinely fail plants during seasonal shifts. I have seen thriving herb gardens turn yellow in july because a timer set in april never got updated. Sensor-based systems remove that risk entirely.
The best indoor garden maintenance tip I can give you is this: treat calibration as a one-time investment. Spend two days getting your dry and wet values right, and the system will reward you with months of hands-off reliability. Skipping calibration is the single fastest way to turn a helpful tool into a plant-killing machine.
— Luna
Automated garden systems built for busy urban growers
If you are ready to put your indoor garden on autopilot, Sprout-lab has built a range of systems specifically for small-space urban gardeners who want results without the maintenance burden.
Sprout-lab’s garden systems for busy people cover everything from beginner-friendly automatic watering kits to modular setups that scale as your plant collection grows. Their hydroponic systems support up to 56 plants in a compact footprint, with a 4.9/5 rating across over 25,000 completed orders. For gardeners who want a low-touch growing setup from day one, Sprout-lab’s product line is a practical starting point.
FAQ
What is the best indoor garden watering system to automate watering?
The most effective method is a soil moisture sensor connected to a pump relay, set to trigger at 20–25% VWC. This approach reduces water waste by over 80% and adapts to real soil conditions rather than a fixed clock.
How do soil moisture sensors work in an indoor garden watering system?
A soil moisture sensor detects electrical resistance in the soil, which rises as soil dries out. When resistance crosses the programmed threshold, the controller triggers the pump to water until moisture returns to the target level.
Is a timer-based indoor garden watering system reliable?
Timer-based systems are reliable for consistency but not for accuracy. They cannot adjust to temperature changes or seasonal shifts, which means they risk overwatering in cool months and underwatering in warm ones.
What is hysteresis and why does it matter for indoor irrigation?
Hysteresis means the pump turns off at a higher moisture level than it turned on, preventing rapid on-off cycling near the threshold. Without it, pumps wear out quickly and sensor readings become unreliable.
Can a beginner set up an indoor garden watering system without coding?
Yes. Kits like the RainPoint system for 10–15 plants use simple twist dials for duration and frequency with no app or coding required. They are the fastest path to automated watering for anyone new to indoor garden irrigation systems.
Recommended
Choosing an indoor garden watering system
An indoor garden watering system can be as simple as a timer and pump or as involved as sensors and a controller. Choose an indoor garden watering system that you can understand and maintain.
Check how an indoor garden watering system handles failure. If a pump, sensor or timer stops, you should know how to water by hand until it is fixed.
Test your indoor garden watering system for a week before leaving it unattended. Watch for leaks, overflow and uneven watering, and adjust before you rely on it.
Our timer guide explains a simple starting point for an indoor garden watering system.
Maintaining an indoor garden watering system
An indoor garden watering system needs regular checks even when it is automated. Look at tubing, emitters and the reservoir for blockages and leaks.
Clean an indoor garden watering system periodically, because mineral buildup and algae can clog parts. Replace worn parts before they fail.
Keep notes on how your indoor garden watering system performs through the seasons, and adjust timings if plants look too wet or too dry.